
OCAP SFG GUI
OCAP SFG GUI is a graphical user interface for the OCAP Security File Generator, OCAP SFG. The GUI is written in Java and allows the user to operate OCAP SFG from of a set of easy to use screens rather than via the command line.
Features include:
- Simple RSA key and certificate request creation.
- Easy installation of certificates into the OCAP SFG database.
- Extensive on-line help system.
- Multiple SFG Resource Directories per execution of SFG. You can use different SFG resource files for different signing purposes, e.g. different signatures for test and production applications.
- Greatly simplified mechanism to generate dual signed OCAP applications and code images.
- Permission Request File generator including all Monitor Application permissions.
- Creation or modification of Credentials which you may need to supply to other OCAP application vendors.
- Easier approach to setting up Hardware Security Modules (for storage of your private keys).
- Easy to set-up User Profiles consisting of Application Signing, Code Signing and Ceriticated Request Format profiles.
Sample screen shots:
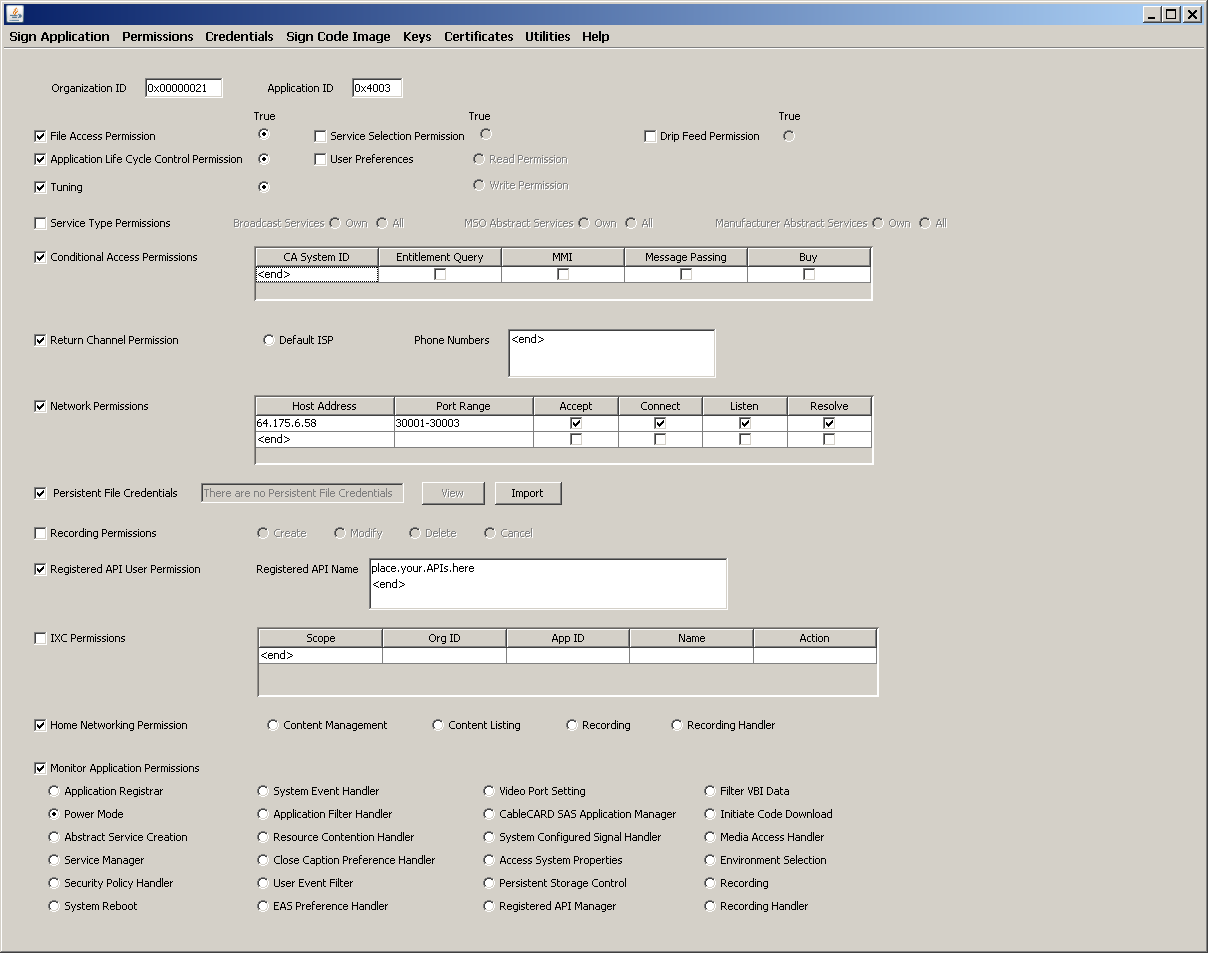 Permission Request File Generation
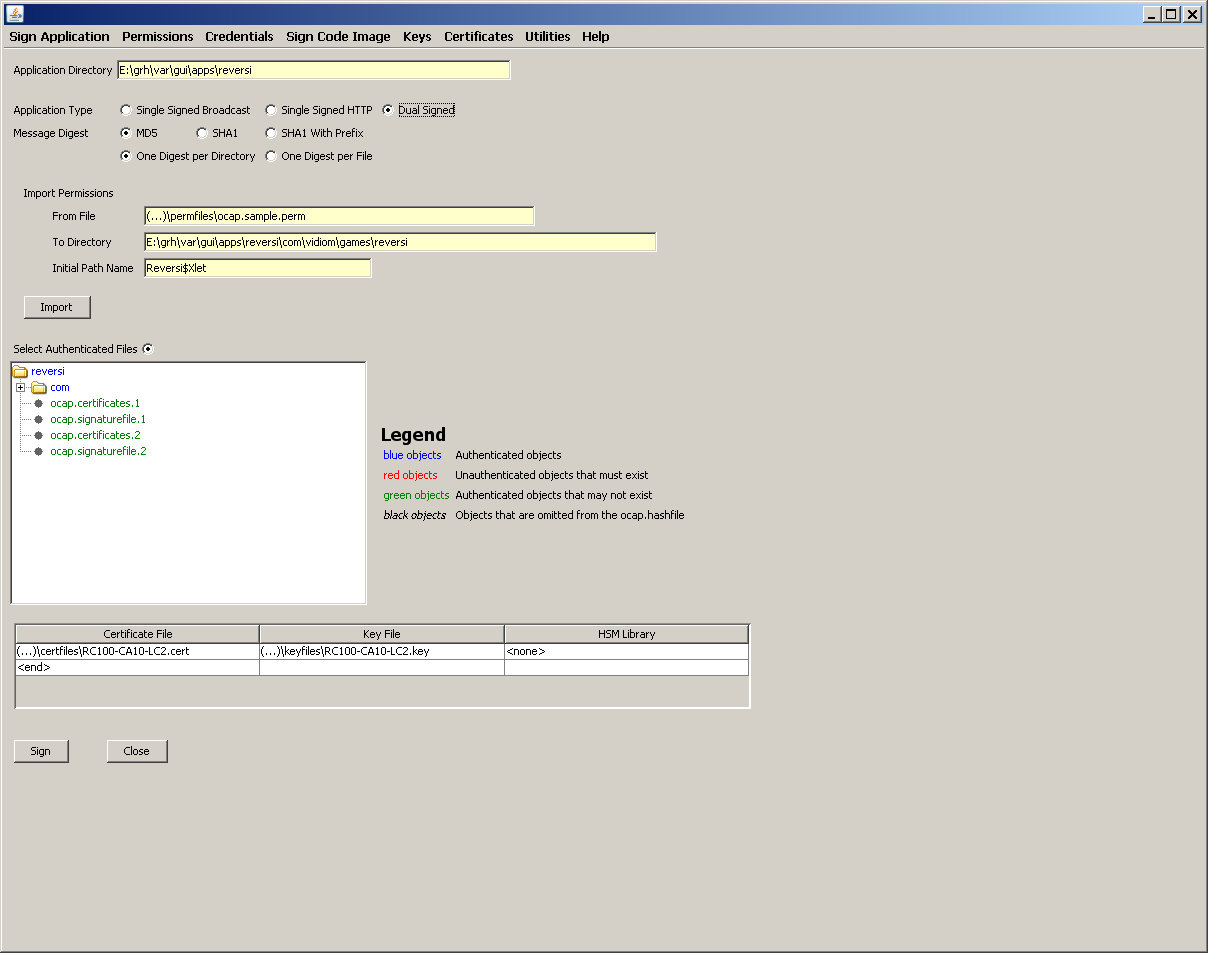 Signing OCAP Applications (including co-signing)
Getting Started
- Run OCAP SFG GUI and enter a suitable resource directory.
- Use Keys->New to generate an RSA key which you will use to sign your apps. or code images.
- Your key will need to be authenticated by a Certificate Authority authorised by Cablelabs: so generate a certificate request, using the Certificates->Requests->New.
- Send certificate request to the certificate authority ("CA"). The CA should provide you with (i) an authenticated certificate, (ii) the CableLabs Code Verification Root CA Certificate and (iii) CableLabs Code Verification CA Certificate or CL Application Code Verification CA Certificate.
- Certificates->Install to install the certs. in order of the CL Code Verification Root CA Certificate, then the CL Code Verification CA Certificate and finally your certificate.
- Go to Sign Application->New to sign applications. (You may wish to set-up a user profile first using Utilities->Profile->User Profile).